This is another excellent article by Mikey, a frequent contributor to MachinistBlog.com and winner of our “Machining Metal as a Hobby” contest.
The Jet HVBS-56M, like most of its brethren, lacks a suitable table for vertical cutting. The OEM table is, in my opinion, unsafe for use in the hobby machine shop because of its extreme flexibility. It is also a major hassle to put on and remove. Use it a few times and you will quickly realize a better table is a must, and as there are no really good aftermarket tables out there a shop-made table is your best option.
For the benefit of new owners thinking about building such a table, there are a few things to consider. These are MY requirements; others may differ.
- It has to be rock-solid in use. This is both safety and accuracy.
- It has to be square to the blade, from the side and the front, so that cuts are accurate without the user trying to manipulate the work to follow a line or to make cuts come out even on the top and bottom of the work.
- It needs to go on and come off quickly, preferably without needing tools to do so.
- It needs to wear well and not impede the cutting process in any way.
- It must not interfere with the saw when cutting in horizontal mode.
- It needs to be easy and inexpensive to build.
The Problem
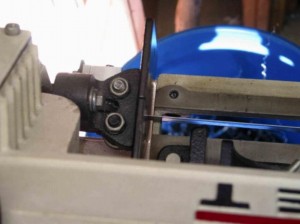
The key problem with these saws is that the entire table, regardless of how fancy or robust it may be, is supported by a tiny area measuring 5/8 deep by 2-1/4 wide (on Jet saws) atop the lower blade guide. This small area is usually left as cast and not anywhere near flat. Instability is guaranteed by this design, but there are two things you can do to improve this situation (aside from milling the mounting area atop the blade guide itself). In my view, both are necessary.
The first is to make a sub-table to support the main table that will mount to it. The second is to make a support that slips under the main table after it is installed to take the pressure off the lower blade guide mounting point.
Note that a brace behind the table will not be solid enough to prevent movement of the main table (yeah, I tested this). However, a brace in front of the sub-table does help. I had one mounted to the area where my chip brush now sits such that it supported the front of my sub-table, and that helped a lot. However, an independent support under the main table is more robust and works significantly better.
I won’t speak to the design of others, many of whom have come up with beautiful and ingenious designs worthy of emulation. Search the 4X6 Yahoo group and you’ll see what I mean. Here, I will discuss my own as an example of how a table can be made to fulfill the requirements listed above. It isn’t fancy, just safe and accurate. You can decide what will work best for you.
The Sub-Table
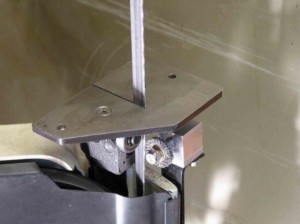
The ¼-inch thick mild steel sub-table screws directly to the lower guide mount and will replace the tiny OEM one. By making it as large as is practical and locking it down to the lower guide you will, in effect, increase the area to which the main table is mounted but, at the same time, doing so substantially increases pressure on the two screws holding it in place. Accordingly, you must provide some support under your main table, discussed below. Note also that pressure applied to the main table will cause the lower guide post to move unless a table support is used. I have not tested the impact this has on accuracy simply because I can’t figure out how to measure it.
The shape of the sub-table shown is as large as possible while still clearing all obstacles and will enable you to cut small pieces without resorting to using the main table. Make a paper template until you get the fit right on your saw and then cut it out. Cut a slot with your band saw from the back side of the sub-table until the blade is centered. Transfer punch the screw locations from below, then drill and countersink for your mounting screws.
Now is a good time to shim the sub-table so that it is square to the blade in the lateral and front-to-back planes. Doing so automatically squares the main table upon which the majority of vertical cutting takes place.
The Main Table
 The main table is large enough to support most work you will do when vertical cutting. In use it takes about 20 seconds or less to mount or dismount so it is not a major impediment to your work flow. While the sub-table will allow you to cut very small pieces the larger table is safer €“ making it easy to mount and dismount will hopefully cause you to use it and perhaps avoid an injury.
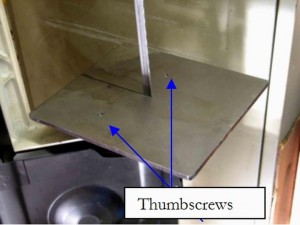
Made of ¼-inch thick steel, it attaches with two ¼-20 knurled thumbscrews to the sub-table beneath (When my hands are near a moving blade I like the support to be rock solid so locking the table in place with screws works for me). Just drill clearance holes in the sub-table, transfer punch through that into the main table, drill and tap for your screws. Be sure the location of the thumbscrews will allow for easy access.
Size it as large as you need. This one is 8 wide X 9 long and works well. The slot is in the center, cut from the back to minimize flex in the working area of the table.
I suggest using steel for the table. Aluminum or wood is not suitable as any sharp edge on your work piece will eventually catch and drag on it, making it hard to accurately cut to a line and causing you to use excessive pressure to feed, which is dangerous.
The Table Support
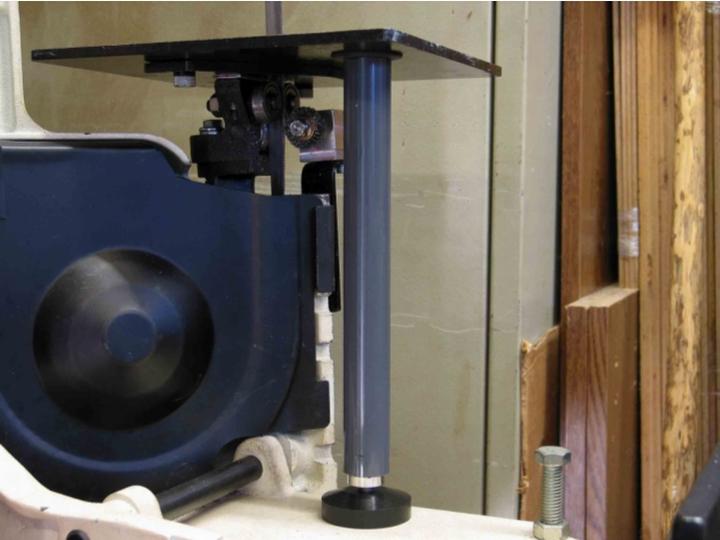
No matter what sort of table you end up with you will benefit from a support under the table. While this may not be needed for cutting thin pieces it is needed when cutting larger or thicker stock due to the pressure you will apply to feed the piece into the blade. Without such a support making accurate stop cuts, where the cut on the top and the bottom of the work is in the same plane, can prove challenging. The support also keeps the saw in an upright position until you are ready to remove the table and lower the saw.
The support pictured above is simply a schedule 40 sprinkler riser with a thin rubber insert on top (to prevent it from moving from vibration), a shop-made aluminum threaded insert epoxied into the base, and a Delrin foot with a 3/8-16 stud, all sized to fit my saw. It takes a simple twist of the wrist to put it in place or remove it. You only need to raise it so it contacts the table, excessive pressure is not needed and the table will not move. However, if you must make an accurate stop cut on a piece that already has a lot of work in it then I would suggest a test cut while fine-tuning the table support so the cut stops in the same plane on the top and bottom of the work.
That’s it a simple functional table for the band saw. It is quick to install or remove and, with the support in place, it is as solid as possible. It isn’t pretty but it will help you work more accurately and safely. All the materials were already in my shop so it only cost me a few hours of time to make.
Just a few tips when vertical cutting:
- Wear leather gloves metal gets hot to hand hold when cutting and one day your hand will meet that blade the gloves will help.
- Always use a push stick. Cutting metal requires a fair amount of pressure and a slip can be painful. Ease up on the pressure just before you break through.
- A wax stick lubricant really helps to make cutting easier and, therefore, safer. I use this in preference to the wet/suds systems for all cuts on the band saw as it works well and is a lot less messy for those of us in non-production situations.
- If you coat the contact surfaces of your steel tables with paste wax, buff it dry, then oil it the table should remain rust-free. Paint the non-contact sides.
Mikey
2009


