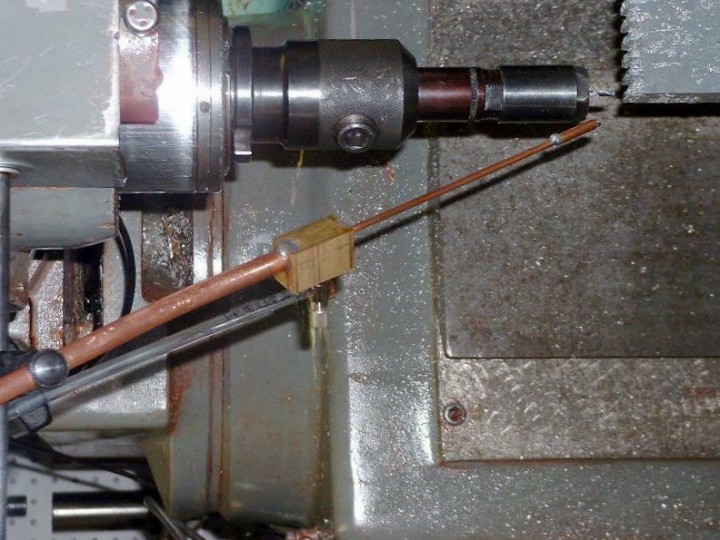
These are Karl Townsend’s plans and construction notes for a zero fog mister. Even though they’ve been floating around the net since at least 2002 they aren’t that easy to find and I’ve heard it works really well. So I asked Karl for permission to republish them here. He says the original is still in use and he thinks at least one hundred people have made one. – Rob
—
I’ve used a mister for many years on both lathes and mills. I hate the mess of flood coolant leaking all over the floor and mist cooling gives about 90% of the benefit. The major problem with mist cooling is fogging or atomizing the coolant so fine it floats around in the shop. Since I’m running a machine many hours a day, I’ve gotten real sensitive to the fog – it gives me a sore throat.
Anyway, I read about a low fog mister called a HenchForth Fog Buster here on this newsgroup. A fellow had obtained a copy of the patent for this unit and made his own. So, I did the same. This unit was better, but still a slight fog or smell of coolant would be in the shop. But, it gave me the idea of how to build a better one. This unit works so well, you can’t tell it’s on – no sign of fog or odor of mist.
The key to operation is in the relative pressure of the coolant and the supply air pressure. A standard mister has the coolant unpressurized and uses 40 – 60 psi air. The Hench unit pressurizes the coolant container to the same pressure as the air line. This unit uses a higher air pressure for the coolant than the air line.
A short explanation of construction:
Build a coolant container out of an old 20 lb. propane tank. Make a removable top to refill coolant (just a 1/2″ pipe plug). Weld in a drain line connection to the bottom of the tank. Provide a way to use a regulator and air line to pressurize the tank to 20 PSI. The drain line goes to the mister as a pressurized coolant supply.
Provide an air supply regulated to 5 psi. Make a way to shut off both this line and the coolant line when the mister is not needed.
The mister unit joins the water line and the air line with a needle valve to control the amount of coolant delivered. Use a small block of brass to make this assembly. The air line passes through the block and must be necked down to 0.100 ” dia. so the air velocity is high. At this point, the coolant line intersects the air line. The coolant line must be very small, I used 0.040 ” dia. at this point. Just upstream from where the coolant enters, there must be a needle valve to regulate coolant flow rate. I just soldered in a McMaster needle valve – #48965K24.
Use a 6″ long 1/8″ OD brass tube for the mister extension shaft. To the end of this solder a nozzle. This must be 0.75″ long and have an inside diameter of 0.040″.
Again, this unit is a total success for me. It runs up to six hours a day with absolutely no fogging. Mist rate can be controlled from nearly nothing to a heavy, nearly flood mist.
Read this thread. Al found a couple ways to make construction easier.
http://www.cnczone.com/forums/showthread.php?t=87439
I like the way he’s designed the coolant tank. It’s rather elegant, doesn’t require any welding and looks simple to make. It also eliminates having a supply pipe at the bottom of the tank that could break and make a mess. But his nozzle and mixing block is an ugly kludge that would be too big to mount on my mini-mill or lathe.
Here’s another nice variation of Karl’s fogless mister. The thread includes lots of pictures and an explanation of why it doesn’t create fog:
http://cnczone.com/forums/showthread.php?t=102934